
Lathe Turned Alabaster Vessels - Part I of 3
See also Turning Alabaster on a Wood Lathe - an outline of FAQs - it covers alabaster turning in a more general way. This section is specifically how I work, omitting some general discussion and many useful techniques that I am not currently using.
Contents:
- In the Beginning
- Stone Selection
- Initial Layout
- Cutting the Stone
- Mounting to the Lathe
- Tools, and Techniques for Using Them
- Roughing Out
- Reinforcing the Stone
Well not quite THE beginning, but a very long time ago, a great inland sea covered the area of land we now call Colorado. The creatures of that sea lived and died. Their calcium-rich shells collected on the sea floor for millions of years. The seas dried up, the Rocky Mountains pushed up through, and in some areas the heat and pressure changed the calcium deposits to alabaster.
With saws, bulldozers, or explosives that alabaster is now extracted from the earth. Most of it is then sold for carving, but alabaster is also an ideal medium for lathe work. Unlike wood, alabaster has no grain structure, it cuts just as well in every direction. Unlike wood, it does not shrink and expand with humidity. Unlike some wood dust, alabaster dust is not known to be toxic. It is easy to work, easy to finish and just plain beautiful. So for us, the turners, in the beginning it's like this.
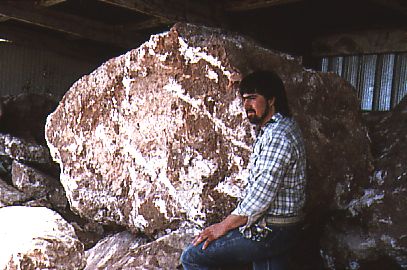 Stan Jones of Colorado Alabaster Supply with just another stone |

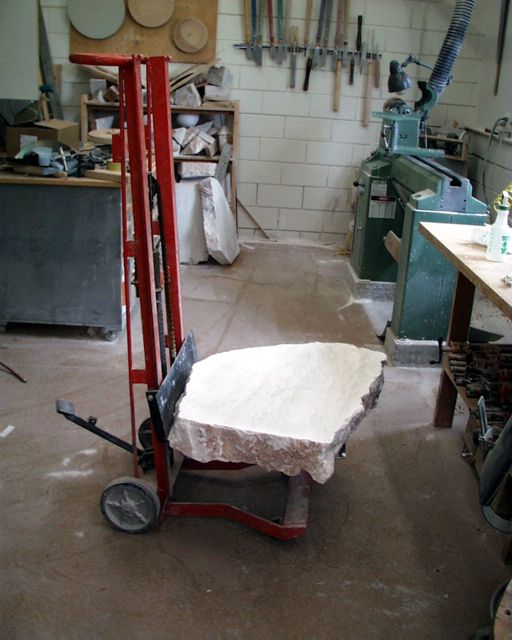
Alabaster is available to turners in manageable blocks. Just how large "manageable" is, is up to you. I have a four-wheel hand truck with a hydraulic lift (fig. 2-1). With it I can handle blocks up to 200 lb. without much trouble and blocks up to 400 lb. if I need to. When I have a block over 300 lb. I will generally make some cuts while it is still in the back of my pickup.
The things I look at when buying
stone at the lot are:
Size and Shape: when they are too big or too small there isn't much
to do about it. If it's an odd shape, will I be paying for stone I won't
be able to use?
Structure: are there any obvious flaws such as water damage or mud
inclusions? If so, can I work around them? A lot can be done with the vacuum
reinforcement techniques described below, but it's not always worth doing.
Color: it's all beautiful, but we all have our favorites too; this
is an aesthetic choice.
Layering:
how easy will it be to orient the stone to get my current favorite pattern
of layers in the bowl?
With experience you will learn to recognize "Leverite" (as in "leave 'er right there"). These are the stones that would be perfect - if only ....... Don't even think about taking these home with you. Do realize though that my "Leverite" might be your museum piece.
Most suppliers will ship stone to you. Many of them (and more all the time) are familiar with the needs of turners.
Before the stone is mounted to the lathe there are some decisions to be made.
What is the best use of this stone? Should this be one turning as large as possible with whatever useable offcuts I get? Or, should I cut the stone into smaller blocks for several medium sized turnings?
Alabaster frequently has a pattern in it caused by the layering of sediment. How will that pattern contribute to the finished work?
How will I handle any flaws in the stone?
Experience is the only teacher for some of these questions. If you have never turned Alabaster before make your best guess, then try to do better the next time. Remember, size alone makes a statement, but there is, in the end, more ugly in a large ugly piece than in a small ugly piece.
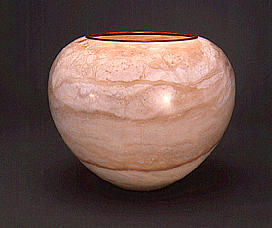
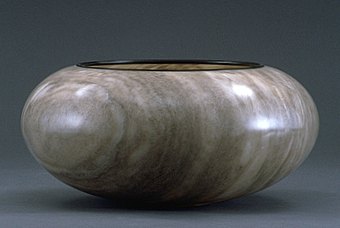
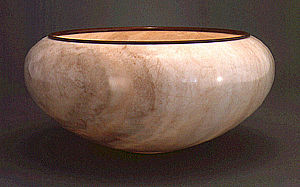
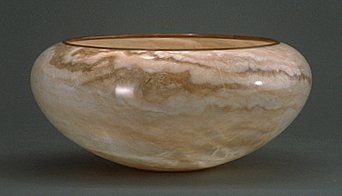
Usually, I will orient the stone so that the layering is either horizontal (fig. 3-1), or vertical (fig. 3-2 and fig. 3-3). Slight shifts from horizontal can also be quite effective (fig. 3-4).
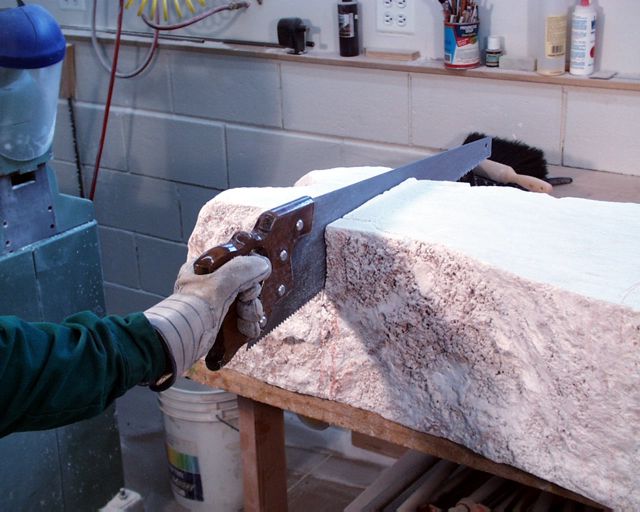
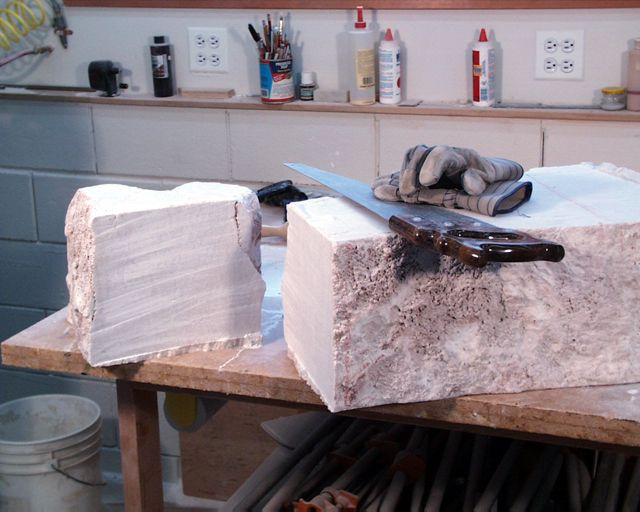
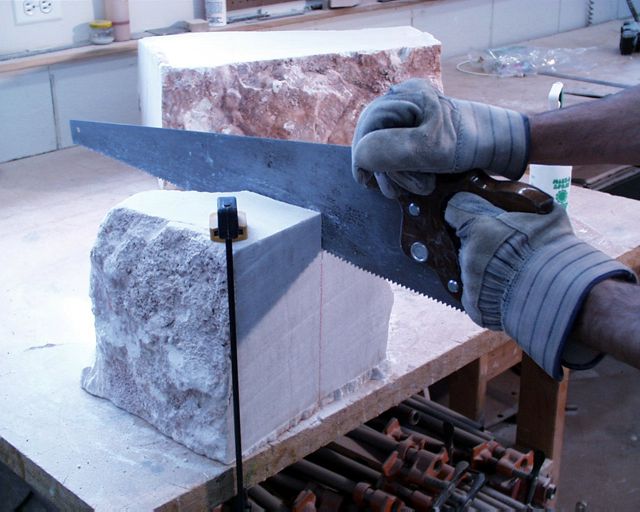
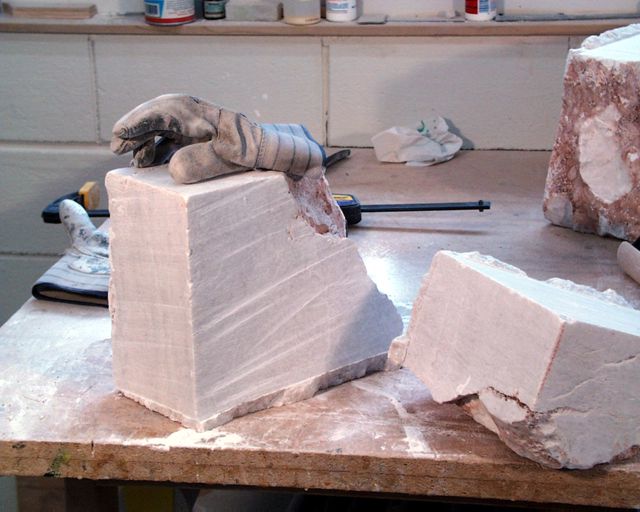
A hand saw works well for the initial cuts, the larger the teeth the better, keep a file handy for sharpening. I find I can cut a square foot of stone in about 45 min. Colorado stone frequently has bits of quartz in it. If I hit a piece, I stop, turn the stone so I am still cutting in the established slot but not trying to cut through the quartz. Then I cut until I hit the quartz again, turn the stone again, cut some more until the cut is through. The first time you hit a piece of quartz you may not realize it, you just won't make much progress on the cut and, in the process, make the saw dull. That's why you have the file. With some experience you will feel the quartz sooner and spend less time with the file. If you happen to hit more than one piece of quartz in the plane of the cut you can either power on through, accepting the damage to the saw teeth, or start another cut. In figure 4-1 I am making the first cut in a 200 lb. block, figure 4-2 shows that cut completed. The block on the left in figure 4-2 is then cut again (fig. 4-3) and the block on the left in figure 4-4 is what I will be turning in the rest of the photos.
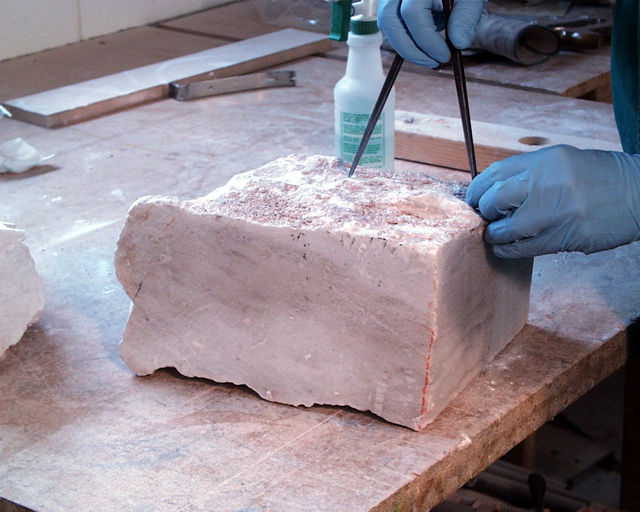
In figure 5-1 I am using dividers to find the center.
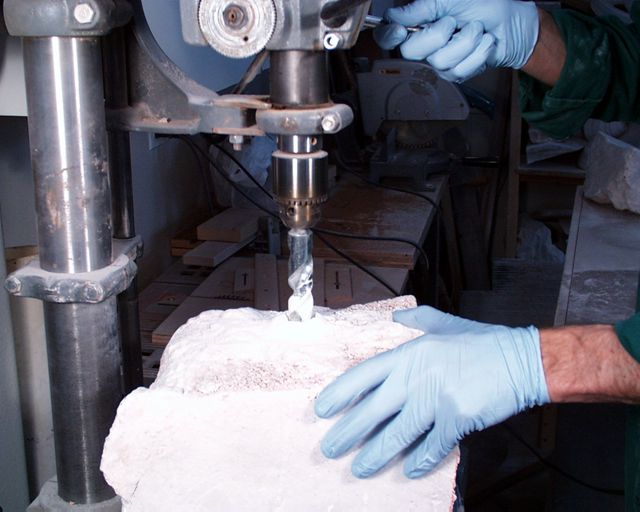
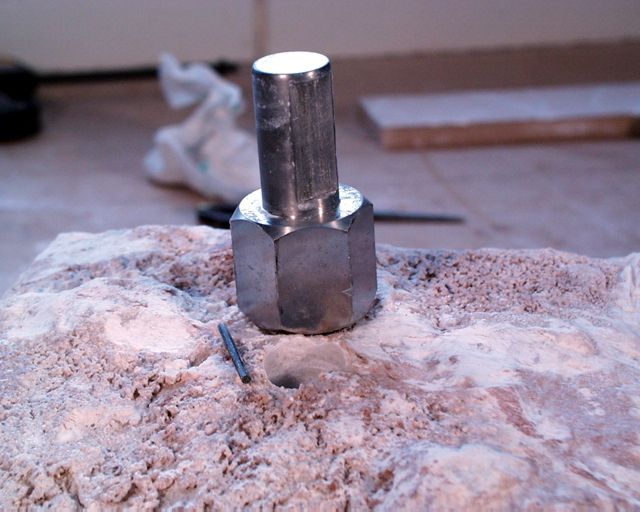
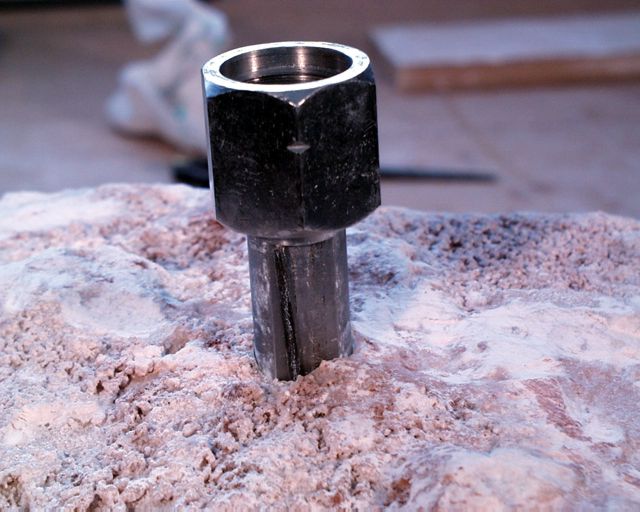
Next I drill a 1" hole (the hole size depends on the size of the pin chuck) with the drill press (fig. 5-2). I use a carbide tipped masonry bit. These bits are typically oversized for use with concrete anchors so you may need to grind it down some to get a proper size hole. You can use a standard spade bit until you hit quartz or Selenite (another form of gypsum crystal, usually layered like mica), then you need a new bit. Make some holes in scrap stone to get the size right. Drill speed can make a difference, 600 RPM works for me. Out of the picture is the sand bag the stone is resting on. Sand bags underneath work well to steady the odd shaped stones.
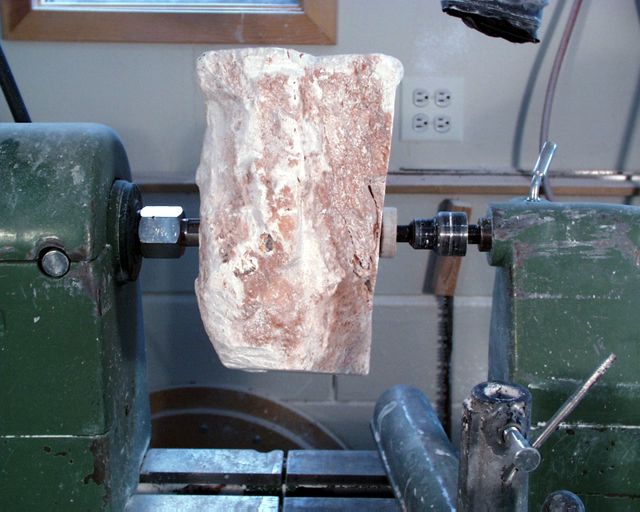
I use a pin chuck (fig. 5-3) from the rim side for the initial rough turning. The old "6-in-1" version works just fine if you have one. New pin chucks are currently available from Best Wood Tools. For the moment you will have to call them about it because it isn't listed on their web site (931-788-0429). Get the one that screws directly onto your spindle rather than the quick change version. The pin chuck (fig. 5-3) consists of two parts, one is the pin and the other isn't. The flat spot on the one part allows both parts to fit into the hole (fig. 5-4). When the work is on the lathe and given a pull, the smaller part binds up against the side of the hole and locks the work to the chuck. To remove it, give it a twist in the opposite direction and pull both pieces out. That's the theory anyway. If the hole has been drilled too large, or if repeated mountings have enlarged it to the point that I can no longer get the pin chuck to grab, I will clean the hole out and epoxy the chuck into the hole. When I'm done it's a bit of a mess to remove the waste stone from the chuck and clean things up. Smearing a small bit of axle grease on the chuck before you glue it in helps.
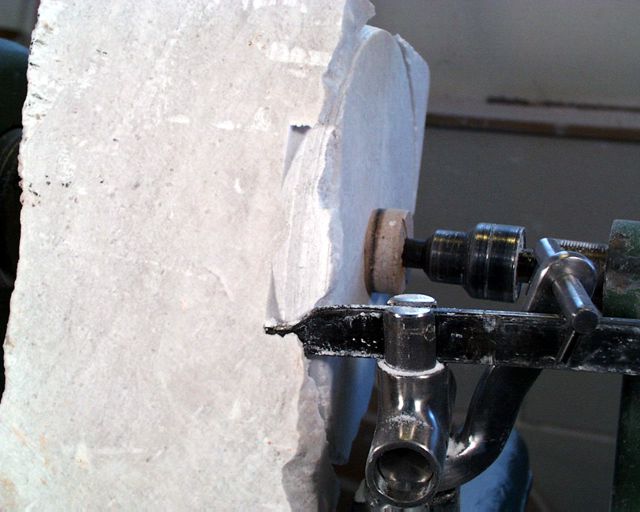
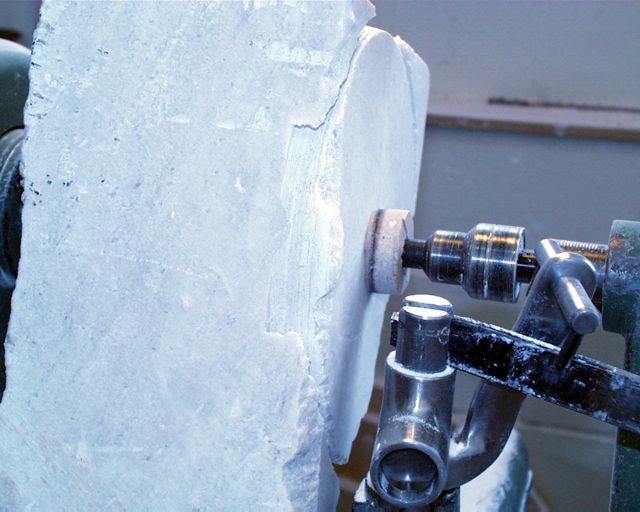
I use a live cup center in the tailstock for extra support (fig. 5-5).
Tools and Techniques for Using Them
All of the "cutting" I do is actually scraping, probably the easiest turning technique to learn. If you are familiar with woodturning, take a moment to forget about rubbing the bevel, cutting, shear scraping, etc. All of those techniques have been developed to cut the tough, organized fibers of wood. Alabaster has no fibers, no grain, and no knots.
Here's are some of my turning tools, in the usual order of deployment.
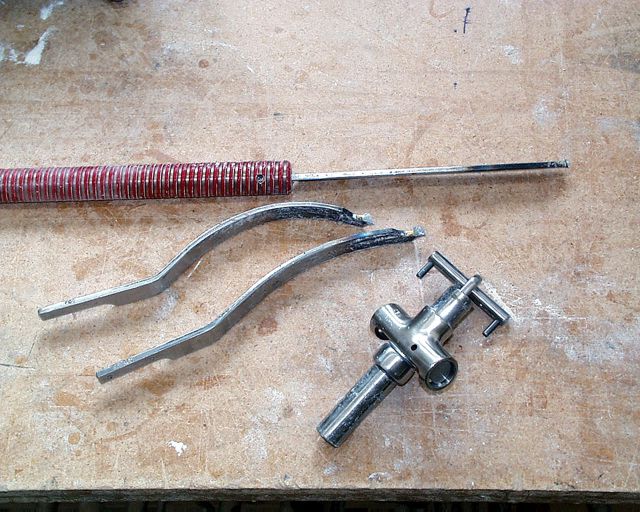
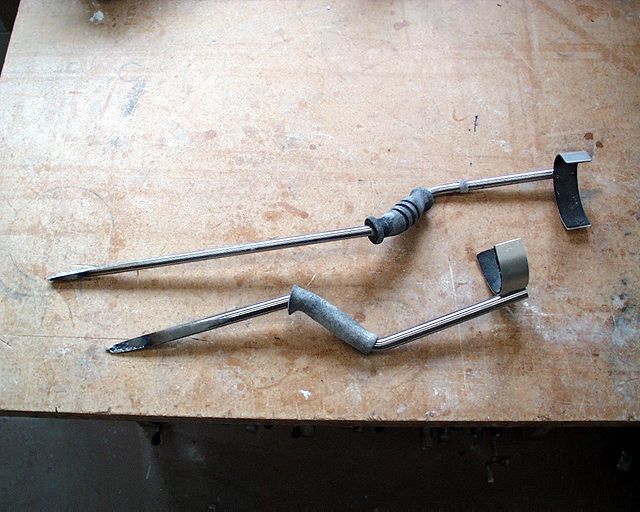
Kel McNaughton Centre Saver (fig. 6-1), www.kelton.co.nz. I have brazed carbide tips onto Kel's blades. The system works very well for both roughing out and coring. Alabaster is inexpensive enough that coring out a piece is more for efficiency than economics, but if the core is large enough, I will of course use it for another turning.
Stewart Slicer (fig. 6-2) - These have evolved into the DSE tool system, available from Packard Woodworks Inc. (800-683-8876) or Craft Supplies (800-551-8876) . Until I got the McNaughton system this was my main roughing out tool. I still use it when the McNaughton has the "wrong" blade in it, the possible core is too small to be of use, or it's just handier.
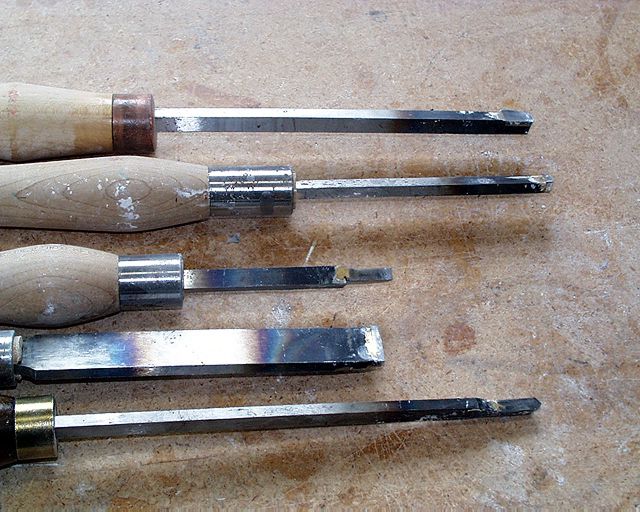
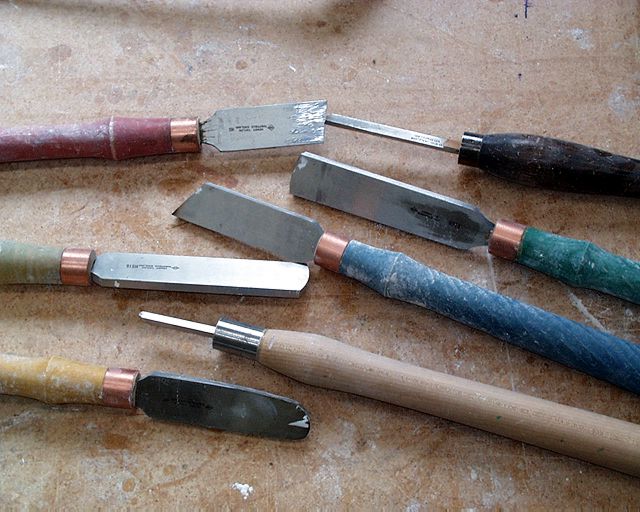
Carbide tipped scrapers (fig. 6-3), these I make from steel stock (no need for High Speed Steel). I get the stock and carbide tips from a machinist supply (KBC Tools 800-521-1740) and braze them on with a SpiteFire propane torch. The tools I use most are: 1" straight, 1/2" round nose, and a 1/4" V-pointed.
High Speed Steel (HSS) Scrapers (fig. 6-4), I have about a dozen of these; 1/4" and 1/2" L and R bevel and round nose, 1-1/2" straight, round nose, L and R bevel and several in various broad radii. They give a smoother cut than the carbide, I use them for the final shaping.
Boring Bar, if you want to make deep pieces this is a must, mine was made by Jerry Glaser. I use both carbide and HSS tips on it.
Sharpening is quite easy. The angle doesn't matter much. For awhile I ground all my HSS scrapers square, and when one side got dull I would just flip the tool over and keep going. I turn just enough wood that I now keep a bevel on them. To sharpen the carbide tipped tools I use a silicon carbide (greenstone) wheel on the grinder, 120 grit.
In general just keep the scraper flat on the tool rest.
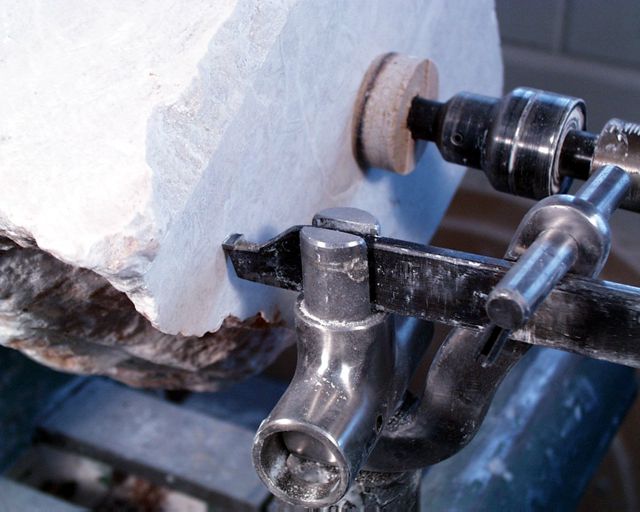
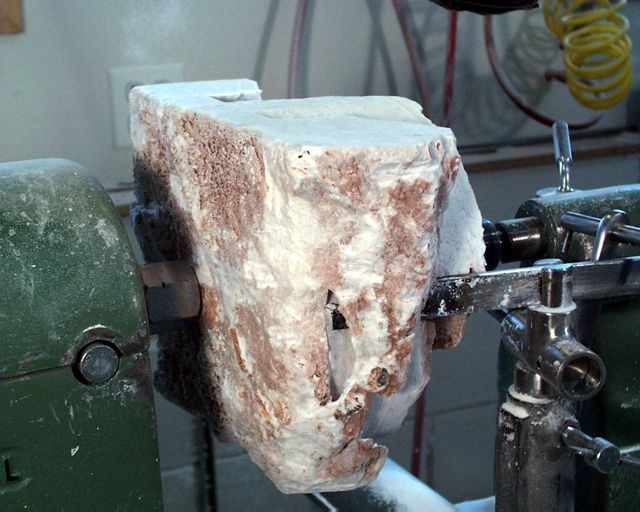

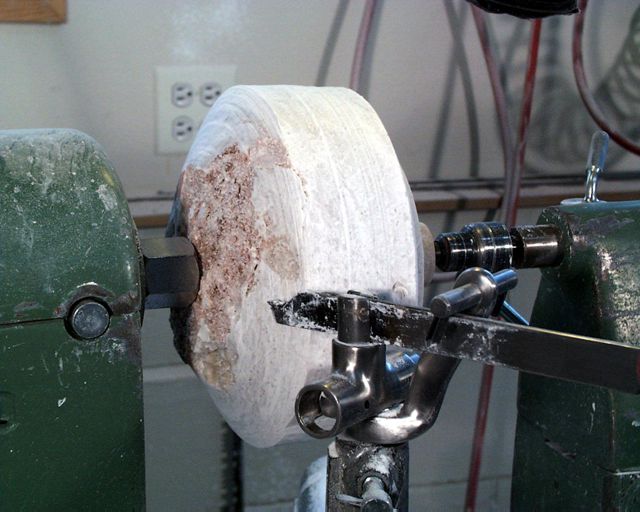
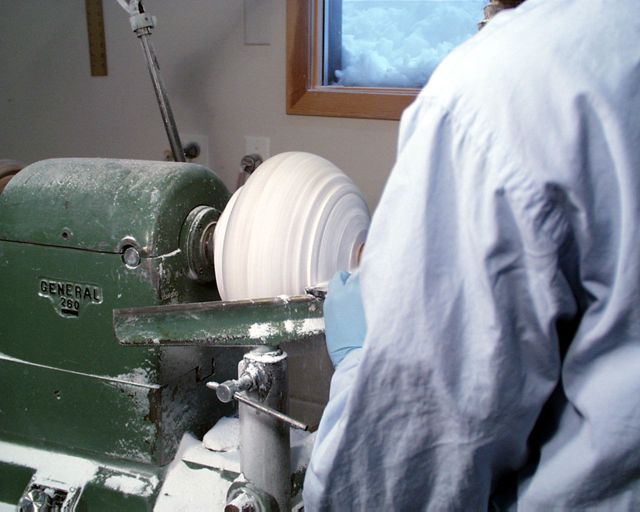

In this series of images I am first using the McNaughton Centre Saver with the straight blade (fig. 7-1 through fig. 7-6), then a 1" carbide tipped straight scraper (fig. 7-6 and 7-7). With the lathe turning about 150-200 RPM I first cut down the sides (fig. 7-4) to bring the piece into round. As I get deeper into the cut I will stop turning and knock off the corners with a hammer. This way I am in control of when the waste breaks off, although at this slow speed the corners don't exactly fly off. The next cuts (fig. 7-6) remove the waste from the top and bottom of the piece. I then change to a carbide tipped scraper (at 250 - 400 RPM) and keep turning until all the waste stone is removed.
Once all the waste is off I can make choices about the overall shape of the piece. Sometimes, while turning to the basic shape I will find areas of rotten stone or quartz crystals that dictate a change in my first intention of the shape. Experience will tell you how far you want to take this roughing out stage.
The extent and method of reinforcing the stone varies with each piece. The minimal treatment is to use thin Cyanoacrylate glue on anything that even looks like it might be a crack. Notice whether the glue flows into the suspected crack or stays on the surface of the stone. If it flows, repeat the application as needed, if the glue stays on the surface it only looks like a crack. If a piece doesn't show any crack "maybes" and seems solid in all respects, this is all it gets. In the example piece, there were several cracks with water damage as well a lot of smaller potential fracture lines. This piece warranted the full vacuum treatment described below. Again, experience will teach you how much reinforcement is called for.
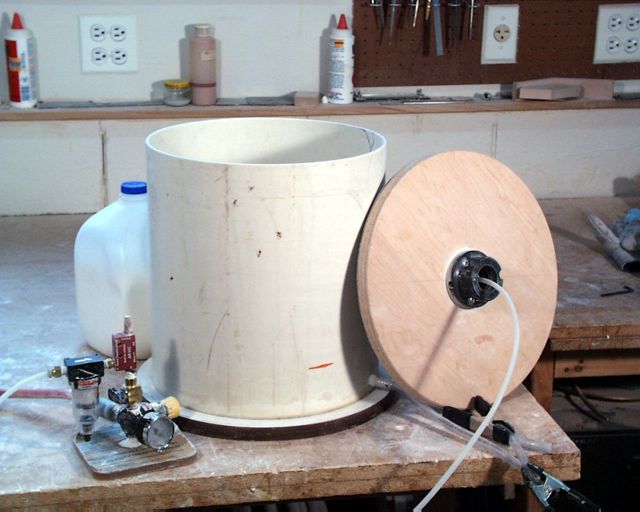
Figure 8-1 shows my venturi vacuum system (from WoodHaven 800-344-6657, they also have a good selection of fittings), the vacuum chamber (made from 12" PVC pipe and particle board), and the lid for the chamber (also made of particle board). The faceplate on the lid allows it to double as a vacuum chuck.
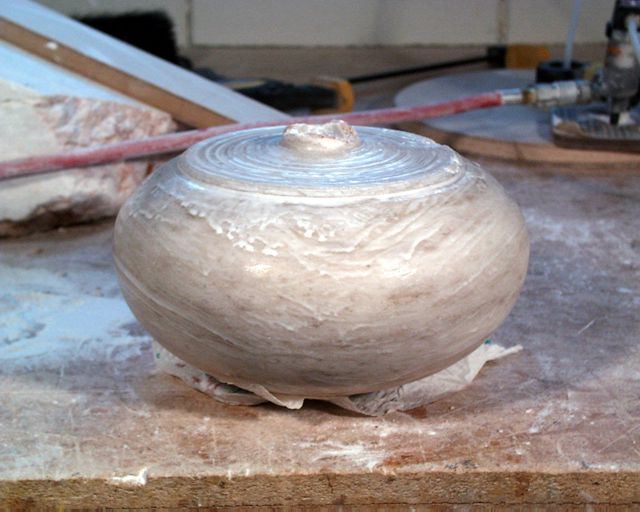
The roughed out stone is put in the chamber and submersed in a thin (1/3 - glue/water) solution of Weldbond® glue. The lid goes on and the air is pulled from the chamber with the vacuum. I run the vacuum for about 3 minutes to evacuate as much of the air in the cracks of the stone as possible. When the vacuum is released, air pressure forces the glue mixture further into the cracks. When the piece comes out of the glue bath it looks like figure 8-2. I wipe the excess glue off the surface and let it dry for 48 hours. After the glue has dried I look for any voids that may need filling and do so with full strength Weldbond®. I allow the glue to fully dry (12 - 24 hours) before turning again.
Weldbond® is a Polyvinylacetate glue. It shrinks as it dries, it thins with water, until it has dried it cleans up with water, it has no solvent odors, it dries to a milky gray color which blends nicely with alabaster, and it retains some flexibility when dry (very important when gluing wood to stone). Weldbond® is available through Ace Hardware stores, (order number 18379 for 22 oz. or 18380 for a gallon) a gallon is $35-$40. Do I like this glue? - Yes. Here's a link to the Weldbond® site for more information about using this adhesive.
Do you have questions, comments, or different ways of doing things? I'd
like to hear from you.
Lathe Turned Alabaster Vessels part II
Lathe Turned Alabaster Vessels part III
Lathe Turned Alabaster Vessels Addenda
Help
support this site |
Home * Send
E-Mail * Site Map * Wood
Turning * Alabaster
Turning * Guitars * Shona
Music * Marimbas * Bio
© 2000 Max Krimmel non-commericial
duplication and distribution expected and encouraged
Max Krimmel - 4875 Sioux Dr. apt. 008 - Boulder, CO 80303 - 303-715-8275