
Laser
Guided Turning Tools
the Articulaser
Theory
Diagrams
In Use
Last Words
After hearing and reading about laser
guided tools I finally decided to look in to them. I did not find much on the
web, hence this page.
I bought a unit called the Articulaser from Craft Supplies USA.
I use it with a boring bar (made by Jerry Glaser in 1987). There are several
versions of the tool available. Some are made to fit a specific boring bar and
others are more generic. If you are buying a unit to use with an existing tool
make sure it will fit.
The assembly and initial set up were simple.
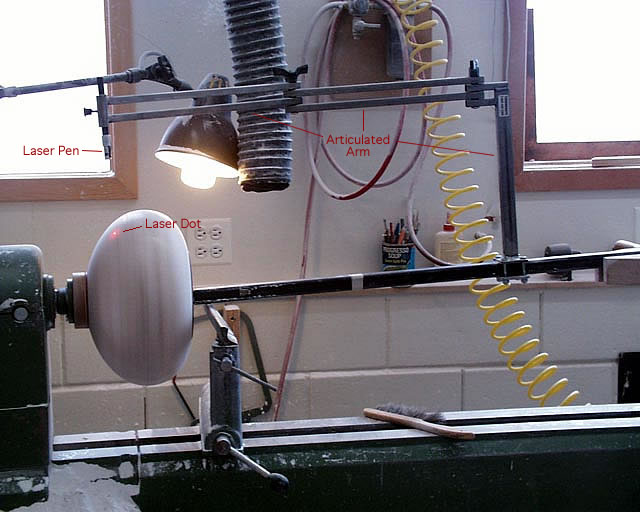
Here’s the theory behind the tool (if you happen
to be still in the dark). A simple laser pen is attached to an adjustable arm
that is attached to a deep turning tool such as a boring bar. The arm has a
reach that extends above the workpiece and as far in as the headstock.
The user adjusts the beam of the laser to shine either at the tip of the tool
or slightly away from the tip, depending on how you like to work. The beam provides
a reference on the outside of the piece as to where the tool point is on the
inside. In theory you can then know the thickness of the walls without resorting
to calipers. Most calipers are limited in accuracy because in some positions,
particularly as you near the bottom of the piece, they won’t fit perpendicular
to the wall.
I decided to set the tool so that the laser beam was 1/4 in. away from the cutting
tool. If the laser beam contacted the workpiece then the wall thickness was
more than 1/4 in. As soon as the beam cleared the outside, then the wall was
1/4 in. thick or less. It was not all that easy to set the tool up as every
time I tightened up the wing nuts the set would change. But that 1/4-inch was
somewhat arbitrary so if I landed within 1/64" I called it good.
The tool tip I was using was a broad radius scraper about 1 in wide. I had set
the laser beam to the farthest out part of the scraper. Obviously it would be
necessary to keep the scraper perpendicular to the wall to keep an accurate
wall thickness.
 |
 |
 |
| Figure 1 | Figure 2 | Figure 3 |
Figure 1 is my initial set up. The tool
is perpendicular to the wall of the piece. Everything is still fine
in figure 2, I've just swung the boring bar around to keep the tool
perpendicular. In Figure 3 there is a problem, I can't swing the bar
any farther and the leading corner of the tool cuts too deeply into
the wall of the bowl. Before I get to this point the tool tip and laser
arm must be re-set so the tool is again perpendicular to the work.
|
||
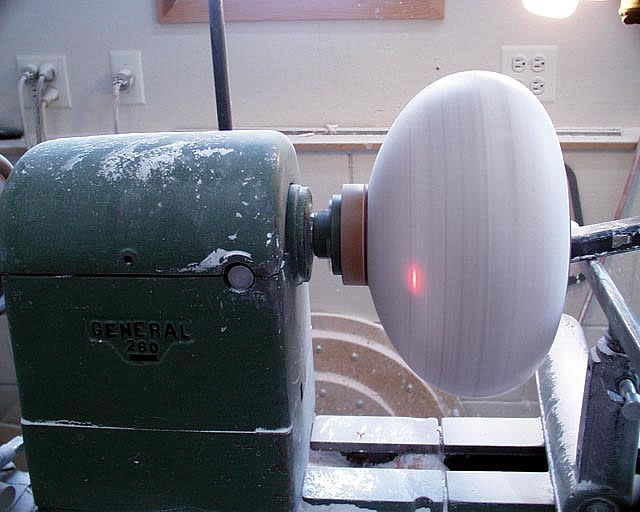
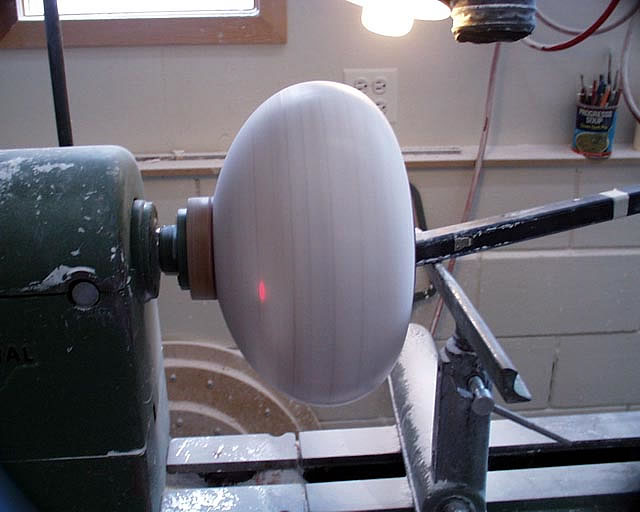
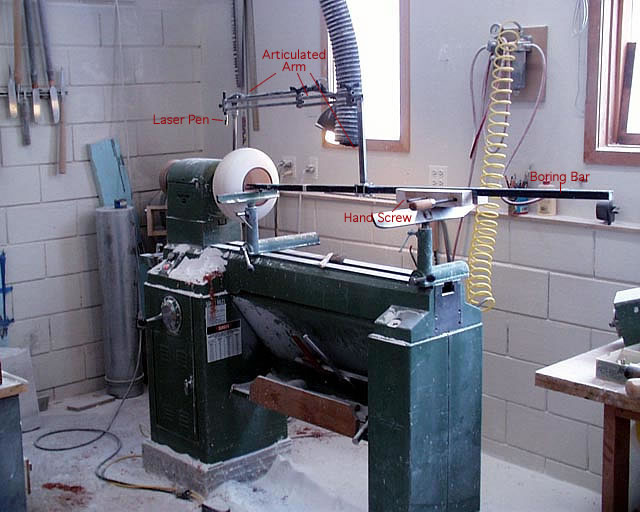 Figure 4 |
 Figure
5 Figure
5 |
Figures #4 and #5 show an overall view of the set up. The boring bar is about five feet long. I use two tool rests for support and a wooden hand screw style clamp on the bar to keep it from rolling.
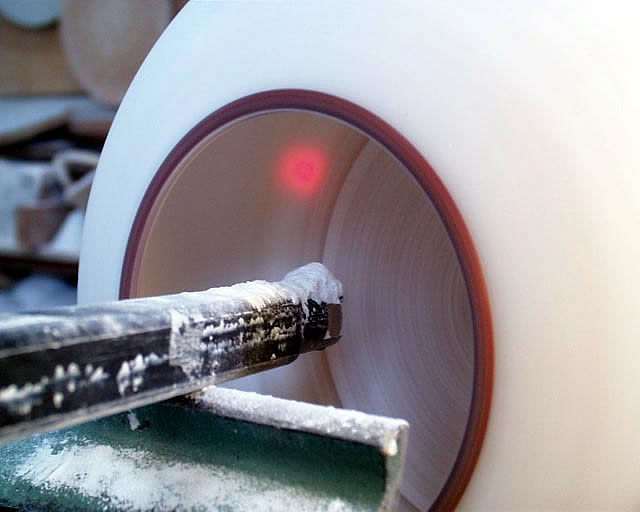 Figure 6 |
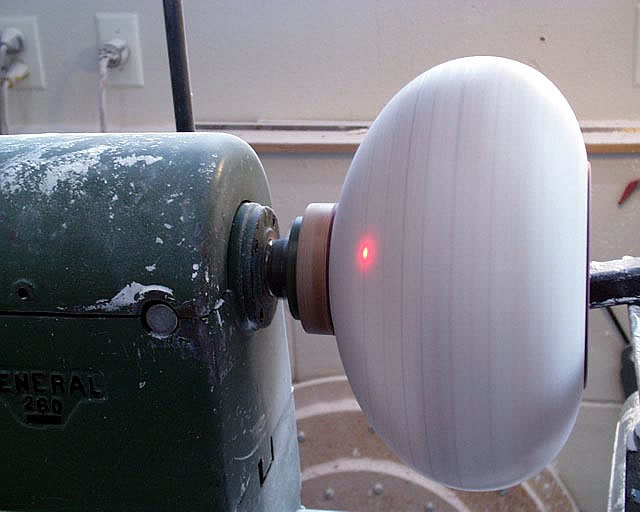 Figure 7 |
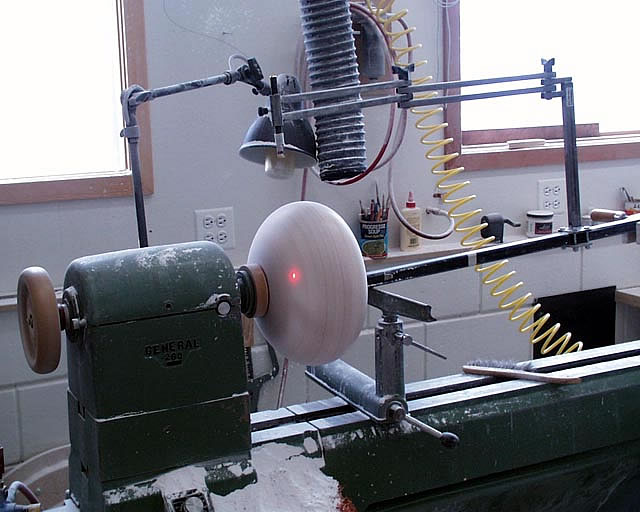 Figure 8 |
This series shows three views at the same stage of turning. The wall is thin enough to allow the laser dot to show through yet still thick enough that the dot is high up on the wall, and well above the tool tip.
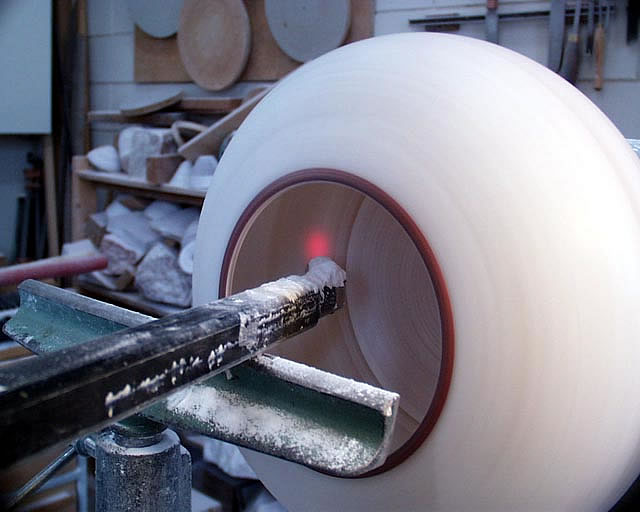
As the wall gets thinner the dot moves closer to the tool tip.
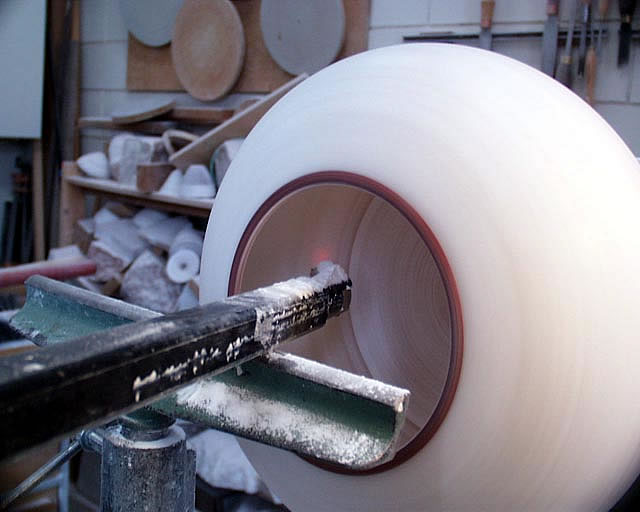
This is where I stop the thinning process on this part of the wall and move to the next section. The dot is just slightly visible inside and just kisses the outside of the bowl.
Some of the advertising for this tool leads one to think that calipers are a thing of the past, totally replaced by this wonderful invention. However, in order to keep the tool perpendicular to the wall the laser needs frequent adjustment. This is enough trouble that calipers are easier and faster until they won't reach. At that point the laser is great.
Home * Send
E-Mail * Site Map * Wood
Turning * Alabaster
Turning * Guitars * Shona
Music * Marimbas * Bio
© 2000 Max Krimmel non-commericial
duplication and distribution expected and encouraged
Max Krimmel - 4875 Sioux Dr. apt. 008 - Boulder, CO 80303 - 303-715-8275